Intro
It was the year 2020. I had to replace the window frames. The existing ones were so thick that they limited the amount of incoming light and simply looked bad. Moreover, they were so worn that they required repair anyway. The sailboat is not standard, and neither are its windows. Making custom aluminum frames turned out to be costly, and the delivery times were not encouraging. New wooden frames would have been too thick for technological reasons. So, the idea of using 3D printing came up. However, 3D printing is something I associate with small toys rather than practical prints. Moreover, the print size was definitely larger than any available printer could offer. Without completely rejecting the idea of aluminum frames, I decided to try 3D printing.
After analyzing the market, I decided to buy a Creality CR-10 printer, which had a large enough working area (300x300x400mm) to print the frames in two parts. Moreover, it was cheap enough that a potential failure wouldn’t be financially painful. However, after the first two test prints, I destroyed the work plate. Fortunately, I found that IKEA LOTS mirrors, along with a bit of hairspray, perfectly replaced it.
I had never used CAD. I am a software developer, and this world was completely foreign to me. Among the paid and free software options, I chose Autodesk Fusion 360. This program is free for home use. It turned out to be quite simple to learn (although I’m still learning!).
So, the equipment was assembled. It’s time to attempt designing and making the frames.
Designing
The shapes of the windows are irregular. Therefore, I took a photo of the window with a ruler attached, so that I could later import it into Fusion 360 as a Canvas and use the ruler for dimension calibration.
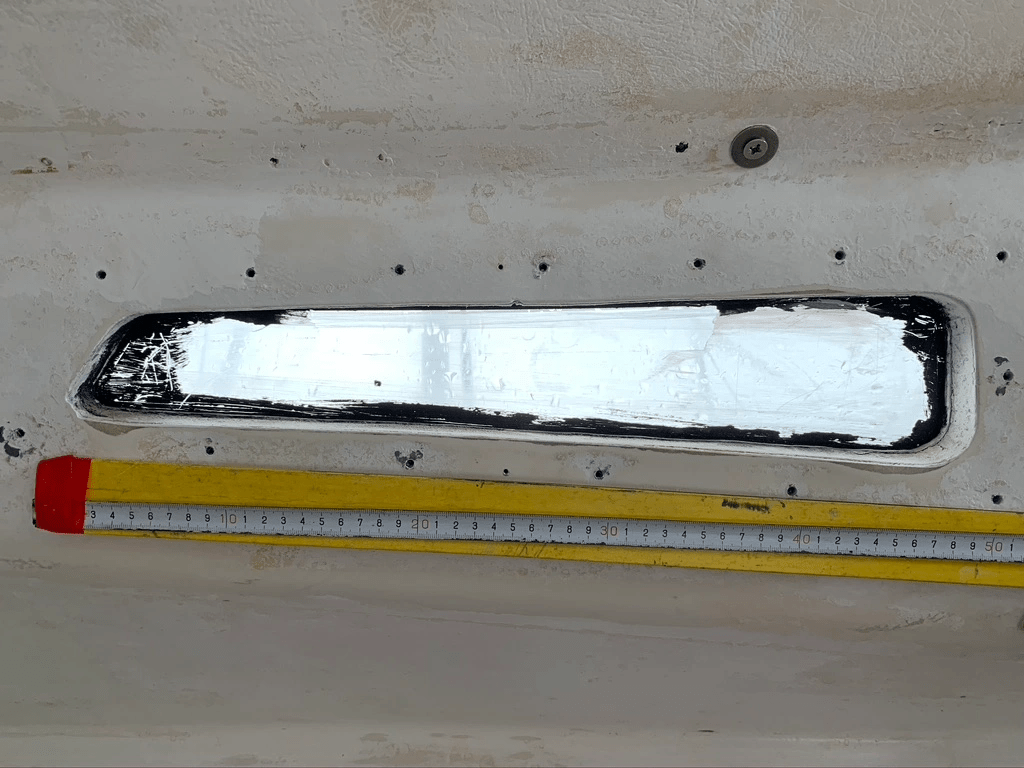
Unfortunately, it turned out that perspective distortions (the photos had to be taken from a close distance) disqualified this solution.
So, I attached A4 sheets to the opening and manually traced the shape. Calibration no longer required a ruler because after scanning, it was enough to set the scan height to the size of A4 (297mm) and precisely align both scans together.

Using Fusion 360 Sketch tools, I traced the scans, automatically adding a wide border and a border for the insert that will fit into the window’s hole.

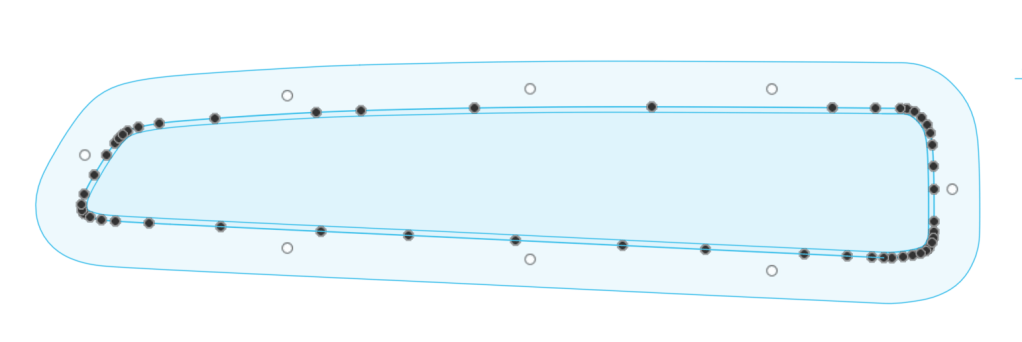
Now it was enough to use Extrude to create a three-dimensional model (Body).

After adding holes for screws and rounding edges, the model was ready for printing.

Leave a comment